There’s nothing quite like a perfectly toasted slice of bread – warm, crisp, and golden brown, ready for your favorite toppings. But the journey from a soft slice to a flawless piece of toast can sometimes feel like a tightrope walk between perfection and a charred disaster. Whether you’re a seasoned cook or a kitchen novice, mastering the art of toasting different bread types without burning them is a valuable skill. This guide will share practical tips and techniques to ensure every slice comes out just right, every time.
The Art of Toasting: Beyond Just a Toaster
While a dedicated toaster is the most common appliance for browning bread, the world of toasting extends far beyond those convenient slots. Understanding various methods and their nuances is the first step to preventing accidental burning and achieving consistent results with any bread you choose.
The Evolution of Toasting Methods
|
Our Picks for the Best Toaster in 2026
As an Amazon Associate I earn from qualifying purchases.
|
||
| Num | Product | Action |
|---|---|---|
| 1 | Amazon Basics 2 Slice Toaster, Extra Wide Slots for Bagels, 6 Browning Settings, Removable Crumb Tray, Defrost/Cancel/Bagel Buttons, Cord Wrap, 900W, Black & Silver |

|
| 2 | Cuisinart CPT-122BK 2-Slice Compact Plastic Toaster, Slots for Bagels & Bread, 7 Shade Settings, Cancel/Defrost/Reheat Functions, Removable Crumb Tray, Small Kitchen Appliance for Home & Office, Black |
|
| 3 | BLACK+DECKER 4-Slice Toaster, Extra Wide Slots, 7 Shade Settings, 1400 Watts, Frozen and Bagel Buttons, Toast Shade Selector, Extra Lift |
|
| 4 | Elite Gourmet 2-Slice Cool Touch Toaster – 6 Browning Levels, Extra Wide 1.25” Slots for Bagels & Thick Bread, Cancel Function, Compact, ETL Certified, Black |
|
| 5 | Elite Gourmet ECT-3100 4-Slice Long Slot Toaster | Extra Wide Slots for Bagels, Sourdough & Texas Toast | 6 Browning Settings | Reheat, Defrost & Cancel | Built-In Warming Rack | Stainless Steel |
|
| 6 | BLACK+DECKER® 2-Slice Toaster with 7 Toast Shade Settings, Extra-Wide Slots for Bagels, Stainless Steel Exterior Finish |
|
| 7 | bella 2 Slice Slim Toaster, Fits-anywhere™ Kitchenware, 6 Setting Shade Control with Reheat & Cancel Buttons, Fits sourdough, 10” Long Slot, Anti Jam & Auto Shutoff, 900 Watt, Oatmilk |
|
| 8 | bella 2 Slice Slim Toaster, Fits-anywhere™ Kitchenware, 6 Setting Shade Control with Reheat & Cancel Buttons, Fits Sourdough, 10” Long Slot, Anti Jam & Auto Shutoff, 900 Watt, Surf |
|
| 9 | Elite Gourmet ECT-1027 Cool Touch Toaster, 7 Toast Settings Cancel Functions, Slide Out Crumb Tray, Extra Wide 1.5" Slots for Bagels Waffles Specialty Breads, Puff Pastry, Snacks, White |
|
| 10 | Cuisinart 4 Slice Compact Stainless Steel Toaster with Extra-Wide Slots for Bread, French Toast, Bagels & Pastries, Defrost & Reheat Functions, CPT-180P1, Brushed Stainless, Removable Crumb Tray |
|
Toast, in its simplest form, has existed for centuries as a way to preserve bread and enhance its flavor. From open fires and stovetop griddles to modern electric toasters and sophisticated toaster ovens, the methods have evolved to offer more control and convenience. Today, you have a range of options, each with its own advantages, allowing you to tailor your toasting approach to the specific bread and your desired outcome.
Essential Factors for Perfect, Unburnt Toast
Achieving that ideal golden crispness without turning your bread into charcoal depends on several critical factors. By understanding these, you can take control of the toasting process, no matter the method.
Understanding Your Bread Type
Not all bread is created equal when it comes to toasting. Different types react differently to heat, primarily due to their moisture content, density, and sugar levels.
- Thin vs. Thick Slices: Thinner slices will toast much faster and are more prone to burning. Thicker slices, like those from artisan loaves, require more time for the heat to penetrate and dry them out, often benefiting from a lower, slower heat.
- High Moisture vs. Low Moisture: Fresh, moist breads (e.g., challah, brioche) may take slightly longer to dry out before browning, while dryer, day-old breads or dense sourdough can toast quickly.
- Sugary Breads: Enriched breads like brioche, fruit bread, or cinnamon swirl bread contain more sugar, which caramelizes rapidly and can lead to quick burning if not monitored closely.
Choosing the Right Toasting Method
Your choice of appliance significantly impacts the process. Each method offers a different level of control and speed.
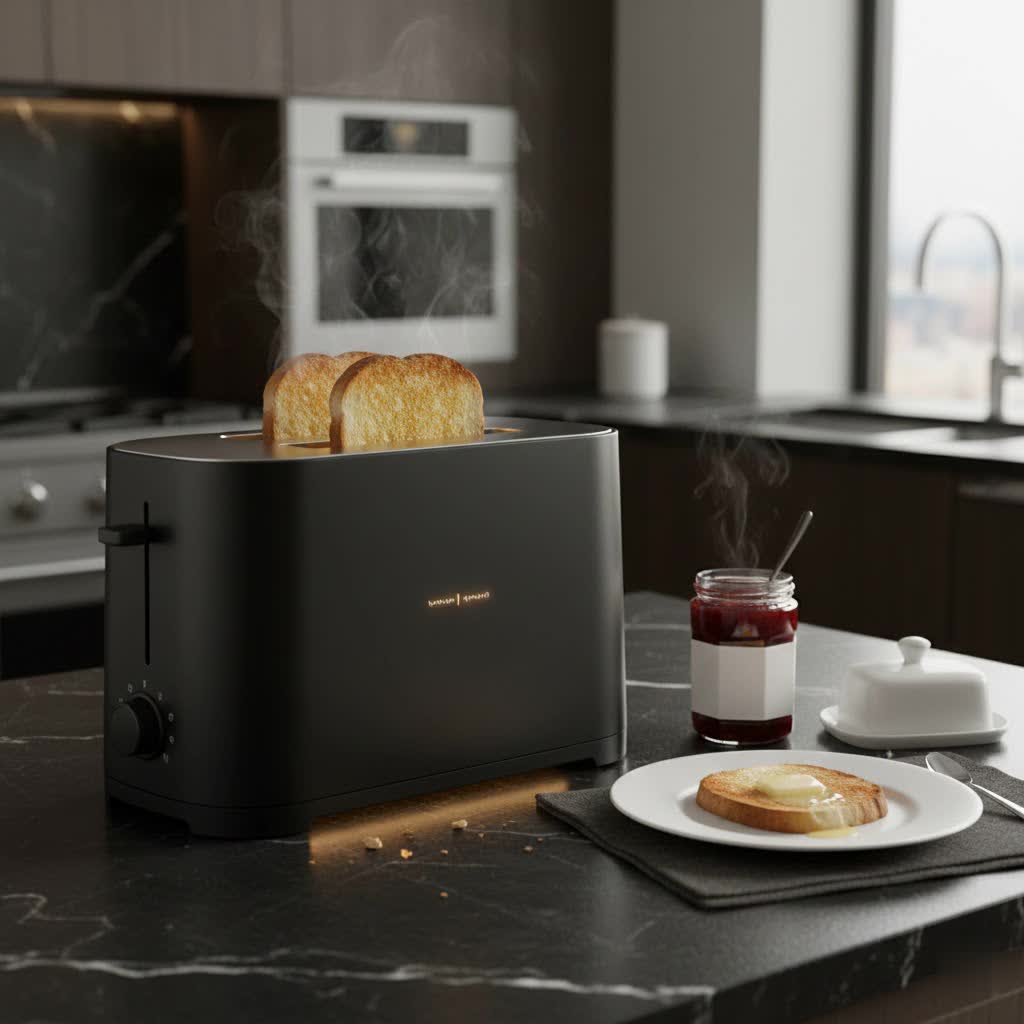
- Toaster/Toaster Oven: These are designed for toast, offering various browning settings. Toasters typically toast both sides simultaneously, while toaster ovens act more like miniature ovens, often requiring flipping. Look for “bagel” settings if you only want to toast one side.
- Conventional Oven (Bake Setting): Ideal for toasting multiple slices evenly. Preheat to 350-400°F (175-200°C). This method is slower (4-5 minutes per side) but less prone to instant burning, allowing for more consistent results.
- Conventional Oven (Broil Setting): This is a high-heat, fast method, often at 500°F (260°C). It requires constant attention, as bread can go from perfect to burnt in less than a minute. Place the rack on the highest or second-highest position.
- Stovetop/Pan-frying: Excellent for a couple of slices and provides direct visual control. Use a skillet heated to medium or medium-high, often with a little butter or olive oil for added crispness and flavor.
- Air Fryer: Many air fryers include a toast setting. If not, a setting around 400°F (200°C) for 3-4 minutes (depending on thickness) can produce great results without preheating.
Mastering Temperature and Time
The interplay of heat and duration is crucial.
- Low and Slow vs. Quick and Hot: For thicker or more delicate breads, a lower temperature over a longer period can yield more even browning and a less burnt exterior. For standard sandwich bread, a quick, hotter toast might be preferred.
- Preheating Importance: Always preheat your oven, broiler, or even your skillet before adding bread. This ensures consistent heat distribution and prevents the bread from simply drying out rather than toasting evenly.
- Monitoring Continuously: This is perhaps the single most important tip. Toasting is not a “set it and forget it” task, especially with high-heat methods. Stay near your bread and watch for visual cues of desired doneness.
Step-by-Step Guide: Toasting Specific Bread Types Without Burning
Different breads call for slightly different approaches. Here’s how to adapt your technique to get the best out of various loaves.
White and Sandwich Breads
These are generally the easiest to toast due to their consistent texture and moderate thickness.
- Toaster: Use a medium setting. Check after 2-3 minutes.
- Oven (Bake): Preheat to 375°F (190°C). Place on an ungreased baking sheet. Bake for 3-4 minutes per side.
- Stovetop: Medium heat with a thin layer of butter or oil. Cook 1-2 minutes per side until golden.
Sourdough and Rustic Breads
Often thicker and denser, these breads benefit from a more gentle approach to ensure the interior warms through while the exterior crisps.
- Toaster (Wide Slot): Use a slightly lower setting than for white bread, allowing more time. You might need to toast it twice on a lower setting if it’s very thick.
- Oven (Bake): Preheat to 350°F (175°C). Place on a baking sheet. Bake for 5-7 minutes per side, checking frequently.
- Broiler: Place on a lower rack position (second from top) to prevent rapid charring. Broil for 1-2 minutes per side, watching constantly.
Bagels and Thicker Slices
Bagels typically have a chewier interior and a denser crust. Thicker slices need more internal heating.
- Toaster (Bagel Setting): If your toaster has one, use it. This often toasts only the cut side while warming the rounded side.
- Oven (Broil): Slice bagels in half. Place cut-side up on a baking sheet under the broiler on the top rack. Broil for 1-2 minutes until golden. Flip and broil the other side briefly if desired, but watch closely.
- Toaster Oven: Use a lower heat setting for a longer duration, around 300-350°F (150-175°C). This allows the heat to penetrate without burning the surface.
Enriched and Sugary Breads (Brioche, Fruit Bread)
These are delicious but notoriously quick to burn due to their sugar content.
- Toaster: Use the lowest setting possible. You may need to cancel mid-cycle.
- Oven (Bake): Preheat to 325°F (160°C). Place on a baking sheet. Bake for 2-4 minutes per side, checking almost continuously.
- Stovetop: This is a great method as it offers precise control. Use very low heat with butter and watch constantly, flipping often.
Advanced Tips and Tricks to Prevent Burning
Beyond the basic techniques, a few pro tips can make all the difference in achieving consistently perfect, unburnt toast.
The Power of Observation
This cannot be stressed enough: do not walk away from toasting bread, especially when using a broiler or a high setting. Toasting can change from golden to burnt in a matter of seconds. Stay vigilant, rely on your senses (sight and smell), and be ready to pull the bread out immediately.
Rack Position and Foiling
In an oven or toaster oven, the distance from the heat source matters.
- Lower Rack for Even Browning: If your bread is browning too quickly on top in the oven, moving it to a lower rack can provide more even heat distribution.
- Using Aluminum Foil to Shield Edges: If you’re toasting something with toppings (like cheesy toast) and the edges of the bread tend to burn before the toppings are melted, lightly wrap thin strips of aluminum foil around the bread’s exposed edges. This acts as a shield, slowing down the browning on the edges.
Pre-toasting Preparation
A little preparation goes a long way.
- Slicing Evenly: Unevenly sliced bread will toast unevenly. Aim for consistent thickness for uniform results.
- Lightly Oiling for Stovetop Methods: A thin layer of olive oil or butter in the pan not only adds flavor but also helps create a beautiful, even golden crust, especially for rustic breads.
Cleaning Your Toaster/Toaster Oven
Over time, crumbs accumulate in the bottom of your toaster or toaster oven. These crumbs can smolder, cause smoke, and even ignite, leading to burnt-tasting toast or a fire hazard.
- Regular Maintenance: Unplug your appliance and regularly empty the crumb tray. For slot toasters, gently shake out any remaining crumbs. Clean the interior of toaster ovens.
A Quick Comparison of Toasting Methods
Here’s a summary to help you choose the best method for your needs:
| Method | Control | Speed | Evenness | Best for: | Risk of Burning |
|---|---|---|---|---|---|
| Toaster | Medium | Fast | Good | Standard bread, bagels | Medium |
| Oven (Broil) | Low | Very Fast | Varies | Multiple slices, thick bread, quick | Very High |
| Oven (Bake) | High | Slow | Excellent | Multiple slices, delicate breads | Low |
| Stovetop/Pan-fry | Very High | Medium | Excellent | Few slices, customized crispness | Medium (with oil/butter) |
| Air Fryer | Medium-High | Fast | Good | Few slices, quick, even | Medium |
Conclusion: Your Journey to Perfect Toast
The quest for the perfectly golden, unburnt slice of toast is a delightful culinary journey. By understanding the nuances of different bread types, choosing the right toasting method for the job, and paying close attention to temperature and time, you can elevate your toast game from hit-or-miss to consistently delicious. Remember, the key is vigilance – toast can transform from perfection to char in the blink of an eye.
Don’t be afraid to experiment with settings, methods, and bread types. Each piece of bread tells a story, and with these tips, you’re now equipped to write a happy ending for every slice. What’s your go-to bread for toasting, and which method do you find yields the best results for you?
Frequently Asked Questions
How do I prevent the edges of my toast from burning when I add toppings like cheese?
When melting cheese or other toppings on toast, especially under a broiler, cover the edges of the bread with small strips of aluminum foil. This shields the edges from direct, intense heat, allowing the toppings to melt and the center of the bread to crisp without the edges becoming overcooked or charred.
Why does my toaster burn certain types of bread but not others?
Toasters vary in heat distribution and duration. Breads with higher sugar content (like brioche or fruit bread) or thinner slices will brown and burn much faster than standard white bread due to rapid caramelization. Adjust your toaster to a lower setting for these sensitive types, or toast them for a shorter duration.
Can I toast frozen bread without burning it?
Yes, many toasters and toaster ovens have a “defrost” setting that adds a bit of extra time to thaw the bread before beginning the toasting cycle. If your appliance doesn’t have this, simply use a lower setting than usual and be prepared for a slightly longer toasting time. Watch carefully, as frozen bread can sometimes toast unevenly.