Few things are as frustrating as a toaster that refuses to pop up your perfectly golden-brown toast. That satisfying “ding” and the warm aroma of freshly toasted bread are a morning ritual for many, suddenly interrupted by a stubborn appliance. As a technician with over a decade of hands-on experience with toasters, from intricate repairs to performance evaluations, I understand the nuances of these everyday kitchen heroes. Before you resign yourself to burnt fingers or a trip to the appliance store, let’s dive into some practical, DIY solutions that can often bring your toaster back to life. This guide will walk you through common causes, essential safety measures, and step-by-step fixes, empowering you to troubleshoot and repair your toaster with confidence.

Understanding Toaster Mechanics: Why Your Toast Stays Down
To effectively fix a toaster that won’t pop up, it’s helpful to understand the basic mechanics at play. When you push down the lever, the bread carriage descends into the toasting slots. This action typically engages a set of electrical contacts that activate the heating elements. Simultaneously, an internal latch mechanism, often supported by a spring and sometimes an electromagnet (solenoid), locks the carriage in the down position. A timer or thermostat then monitors the toasting process, eventually releasing the latch to allow the spring mechanism to push your toast back up.
Several common culprits can disrupt this finely tuned process, leading to a toaster that refuses to pop up or stay down. Accumulations of crumbs and debris are perhaps the most frequent offenders, jamming the mechanical parts. The spring or latch mechanism itself might be faulty or bent, losing its ability to hold or release the carriage. Over time, electrical contacts can become dirty or corroded, interfering with the solenoid’s function, which is crucial for holding the lever down during toasting. Recognizing these potential issues is the first step toward a successful repair.
Prioritize Safety: Your First Step Before Any Repair
Working with electrical appliances, even seemingly simple ones like a toaster, always requires caution. Neglecting safety can lead to electrical shock or further damage to the appliance. Therefore, before attempting any repair or even a simple cleaning, prioritize your safety with these essential precautions.
First and foremost, always unplug your toaster from the wall outlet before you begin. This might seem obvious, but it’s a critical step that prevents accidental electrocution. Once unplugged, avoid touching the heating elements directly, as they can retain heat for some time even after the power is off. It’s also vital to keep water and other liquids away from internal electrical components during cleaning or repair. If you encounter any signs of significant electrical damage, such as frayed wires, burned plastic, or a persistent burning smell, it’s best to stop and consult a professional technician. Your safety is paramount, and some issues are simply beyond the scope of a DIY fix.
First Line of Defense: Simple Fixes Without Opening Your Toaster
Many toaster pop-up problems can be resolved with basic troubleshooting steps that don’t require any disassembly. These initial checks are often the quickest and easiest ways to identify and fix the issue.
The Crumb Culprit: Emptying and Shaking
Table is empty.One of the most common reasons a toaster fails to pop up or the lever won’t stay down is the accumulation of breadcrumbs and debris. These small particles can interfere with the internal mechanisms, preventing the carriage from moving freely or the latch from engaging properly. Most toasters come with a removable crumb tray at the bottom for easy cleaning.
To address this, first, ensure the toaster is unplugged. Then, remove the crumb tray and empty it into a trash can. Next, turn the entire toaster upside down over a sink or trash bin and gently shake it to dislodge any stubborn crumbs or larger pieces of bread stuck inside the slots or around the internal mechanisms. You might be surprised by how much debris falls out, which can often be enough to clear the blockage and restore function.
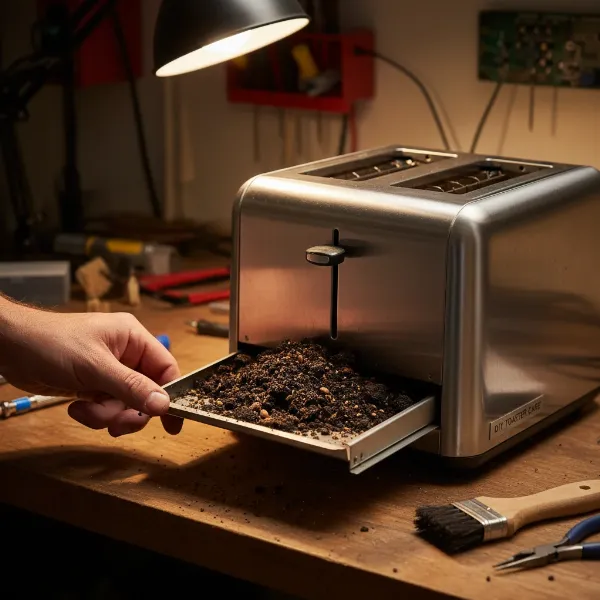 A hand carefully removing and emptying a toaster crumb tray, with crumbs visible.
Clearing Obstructions: Check for Jammed Food
Sometimes, the problem isn’t just crumbs but larger pieces of bread, bagels, or pastries that have become jammed within the toasting slots or beneath the carriage mechanism. These obstructions can prevent the lever from fully engaging or the toast from popping up.
With the toaster still unplugged, visually inspect each toasting slot. If you spot any visible pieces of food, carefully remove them. Use a pair of non-metallic tongs (plastic or wood) to dislodge and extract the jammed items. Never use metal utensils, as these can damage the heating elements or create a severe electrical hazard if the toaster is accidentally plugged in. Also, consider if the bread you’re using is too thick for the slots, as this can also cause jamming.
Testing the Lever and Carriage
After emptying crumbs and checking for jammed food, gently test the toaster’s lever mechanism. With the toaster unplugged, push the lever down and observe its movement. Does it feel stiff, or does it catch on something? Is there any resistance that wasn’t there before?
Manually move the carriage up and down to see if it operates smoothly. Sometimes, minor stiffness can be resolved with this simple manual manipulation, allowing any lingering debris to fall free or a slightly misaligned component to settle back into place. If the lever still feels stuck or won’t stay down, it’s time to consider a more in-depth inspection.
Advanced Troubleshooting: When You Need to Look Inside
If the simple fixes haven’t resolved the issue, it’s likely that a mechanical or electrical problem within the toaster’s internal components is preventing it from popping up. This next stage involves carefully opening the toaster, requiring a few basic tools and a careful hand.
Gathering Your Tools
Before you begin disassembling your toaster, gather the necessary tools. Having everything at hand will make the process smoother and safer. You will typically need:
- Screwdriver set: A variety of Phillips and flathead screwdrivers, possibly including smaller jeweler’s screwdrivers, as toaster screws can vary in size and type.
- Compressed air: A can of compressed air is excellent for blowing away dust and stubborn crumbs from intricate mechanisms.
- Small brush: An old, clean toothbrush or a small stiff-bristled brush can help dislodge caked-on debris.
- Needle-nose pliers: Useful for gently bending back any misaligned metal parts.
- Non-conductive lubricant (optional): A tiny amount of petroleum jelly or a specialized dielectric grease can be used to lubricate stiff moving parts, but must be kept strictly away from electrical contacts.
Safely Accessing Internal Components
Accessing the internal components requires carefully disassembling the toaster’s outer casing. Remember to ensure the toaster is unplugged before you start. Most pop-up toasters have screws on the bottom panel that secure the casing. These screws might be hidden under rubber feet or small adhesive labels.
Carefully remove all screws and gently separate the casing. Be extremely cautious as you open it, as internal wires are often short and delicate. Avoid pulling on wires or forcing components apart. Take note of how parts fit together, perhaps even taking photos, to ensure you can reassemble it correctly. Once the casing is open, you will likely see the heating elements, the carriage assembly, the lever mechanism, and various wires and electrical components.
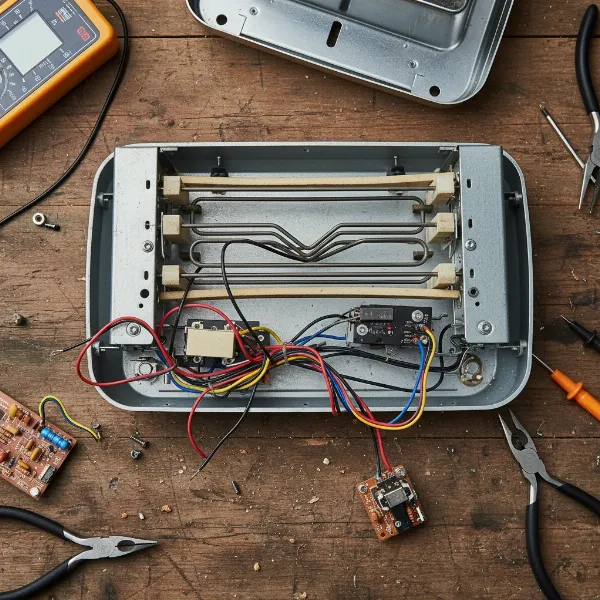 A disassembled toaster showing its internal components, including heating elements, wires, and the lever mechanism.
Cleaning the Latch and Spring Mechanism
With the internal components exposed, you can now thoroughly clean the latch and spring mechanism responsible for holding and releasing the toast carriage. The problem is often simply that accumulated crumbs or debris are gumming up these moving parts.
Identify the latch assembly, which typically consists of a small metal plate or arm that catches the carriage when the lever is pushed down. Use your compressed air to blow away any loose crumbs and the small brush to scrub off any stuck-on grime from the latch, springs, and the rod on which the carriage travels. If the carriage rod feels stiff, apply a very small amount of non-conductive lubricant (like petroleum jelly) to the rod itself, making sure to avoid any electrical contacts. Move the lever up and down several times to work the lubricant in and ensure smooth operation.
Inspecting and Adjusting Bent Parts
Sometimes, a hard impact or general wear and tear can cause small metal components within the toaster to bend or become misaligned. These bent parts can prevent the carriage from moving freely or the latch from engaging correctly.
Carefully examine the metal arms and levers connected to the pop-up mechanism and the carriage. Look for any parts that appear visibly bent or out of their natural position. Using your needle-nose pliers, gently and carefully bend these parts back into alignment. Exercise extreme caution, applying minimal force, as these components can be brittle or easily over-bent. Even a slight adjustment can make a significant difference in restoring the proper function of the pop-up mechanism.
Addressing Dirty Electrical Contacts (Solenoid/Switch)
Beyond mechanical issues, electrical problems can also prevent your toaster from popping up. The lever’s “stay down” function is often controlled by a solenoid that receives power when contacts are made. If these contacts are dirty or corroded, the solenoid might not engage properly.
Locate the small electrical contact points that close when you push the toaster lever down. These are often small metal pads or prongs. Using a clean cotton swab, gently wipe away any dust, grime, or corrosion from these contacts. For more stubborn buildup, you can slightly dampen the cotton swab with rubbing alcohol, ensuring it’s almost dry before cleaning and allowing ample time to air dry before reassembly. Never use sandpaper or abrasive materials, as this can remove protective coatings and cause further damage or arcing. A clean contact ensures a proper electrical connection, allowing the solenoid to function and hold the toast down.
Knowing When to Say Goodbye: Repair vs. Replace
While many toaster issues can be resolved with DIY fixes, there comes a point where repairing might not be the most practical or economical option. Toasters are often designed as affordable, disposable appliances, and the cost of professional repair or replacement parts can sometimes exceed the price of a new unit.
Consider replacing your toaster if:
- The repair cost is high: If internal components like heating elements or the main circuit board are extensively damaged, the parts and labor might be too expensive.
- The toaster is old and inefficient: Older models might lack modern safety features or energy efficiency, making a new purchase a worthwhile upgrade.
- Persistent safety concerns: If, despite your best efforts, the toaster still sparks, smokes, or poses an electrical hazard, it’s safer to invest in a new one.
- Extensive damage: Beyond simple fixes, if multiple parts are broken or there’s significant structural damage, a replacement is usually the better choice.
Ultimately, the decision to repair or replace often comes down to balancing cost-effectiveness, safety, and the emotional attachment you might have to your trusty breakfast companion.
Prolonging Your Toaster’s Life: Maintenance Tips
Preventative maintenance is key to extending the life of your toaster and avoiding future pop-up issues. Simple habits can keep your appliance running smoothly for years.
The most crucial maintenance tip is regularly emptying the crumb tray. For daily users, cleaning it weekly can prevent crumbs from building up and interfering with internal mechanisms. Always unplug the toaster before doing so. Additionally, avoid forcing oversized items like thick bagels or pastries into the slots, as this can bend internal components or cause them to jam. If you must toast larger items, consider cutting them into thinner slices. Finally, keep the exterior of your toaster clean by wiping it down with a damp cloth, and ensure it’s stored in a dry environment to prevent rust or moisture damage.
Conclusion
A toaster that won’t pop up can be a minor annoyance, but as we’ve explored, many common issues have straightforward, DIY solutions. From simply emptying the crumb tray to carefully cleaning internal mechanisms and contacts, you possess the knowledge to tackle these problems. Prioritizing safety by always unplugging the appliance is the most critical step in any repair. While there are times when replacement is the more sensible option, the satisfaction of fixing an everyday appliance yourself is truly rewarding. By understanding the basics of how your toaster works and following these maintenance tips, you can enjoy perfectly toasted bread for many breakfasts to come.
What’s your go-to toaster maintenance trick that keeps it popping perfectly every time?
Frequently Asked Questions
Why does my toaster lever click but not stay down?
If your toaster lever clicks but immediately springs back up, it typically indicates that the latch mechanism isn’t engaging or the electromagnet (solenoid) isn’t receiving power to hold it. This is commonly caused by excessive crumbs jamming the latch, dirty electrical contacts preventing the solenoid from activating, or a faulty spring. Start by thoroughly cleaning the crumb tray and shaking out any internal debris.
Is it safe to use a toaster that has been repaired?
Yes, it can be safe to use a toaster that has been repaired, provided the repair was done correctly and all safety precautions were followed. Ensure all parts are reassembled properly, there are no exposed wires, and the toaster operates without sparking, smoking, or emitting burning odors. If you are ever in doubt about the safety of a repair, it’s best to consult a professional or consider replacing the appliance.
How often should I deep clean my toaster?
For optimal performance and longevity, it’s recommended to deep clean your toaster every one to three months, depending on how frequently it’s used. This involves not just emptying the crumb tray but also a more thorough inspection and cleaning of the internal mechanisms, as outlined in the advanced troubleshooting steps. Regular light cleaning, such as emptying the crumb tray weekly, will help prevent the need for frequent deep cleans.